Dell Wyse ThinOS 9.1 & Windows Virtual Desktop (WVD/AVD) Support

The Dell Wyse team has recently launched support for Windows Virtual Desktop(WVD) on Dell Wyse ThinOS 9.1. This is big news as it allows us to use a non-Windows thin client endpoint to connect to your WVD environment! Microsoft posted a quick announcement about this as well here.

I’ve covered some details about the configuration below and you can access the official documentation here;

  1. ThinOS 9.1 & WVD product summary noted here
  2. ThinOS 9.1 administrators guide here, release notes here, & 8.6 to 9.1 migration guide here
  3. Note – If you are still on ThinOS 8.6 you can learn how to upgrade to 9.x here

The configuration for ThinOS & WVD is pretty straightforward with the only configuration needed is a Wyse Management Suite (WMS) policy to specify Windows Virtual Desktop under the broker setting which is shown below.

Note – by default, the WVD client package is pre-installed on 9.1 but incase it’s not or you’re looking for latest you can get from support.dell.com under drivers for your model, for example 5070, search for ‘wvd’.

  1. In WMS, edit your ThinOS 9 policy and browse to ‘Advanced –> Broker Settings –> Windows Virtual Desktop Settings’ as shown below

2. Under the following section you just need to choose the appropriate WVD deployment model you are using. You will chose either the latest WVD ARM (Azure Resource Manager) based deployment model or the ‘classic’ WVD non ARM based deployment. In my testing, I am using the Azure portal ARM based deployment so I selected the (ARMv2) option. When you are done, click ‘Save & Publish’.

3. Also under, Broker Settings\Global Broker Settings set to – “Windows Virtual Desktop” on your policy as shown below:

4. Once the updated WMS policy is received by your device, you should see your new WVD setting reflected on your device as shown below

4. Once the devices reboots, you should be prompted with the Microsoft Azure AD login screen as shown below 5. At this point you are ready to login into WVD and access your VMs! wmswvd1_4
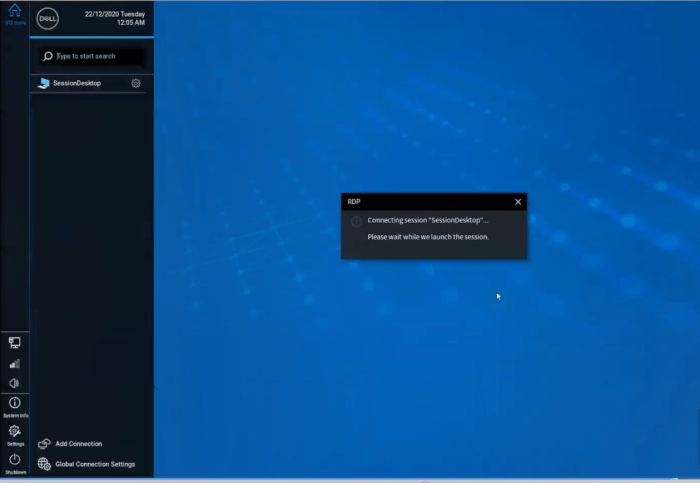
6. In this case I have access to a Windows 10 VM!

Hope you found this helpful!

Additional Resources:

  • If you are new to ThinOS 9.1, here is a quick video overview of some of it’s features.
  • Looking for more details on ThinOS 9.1? Check out the release notes here
  • ThinOS 9.1 release notes discussing WVD setup here & 8.6 vs 9.1 feature comparison here
  • Excellent Dell Wyse community located here
  • Dell Community forums for ThinOS here
  • Microsoft AVD Community forums here
  • Great AVD information site & user community here

@chris_messier ~~> Subscribe to blog to get latest updates <~~

Dell Wyse ThinOS 9 & Netscaler/ADC

I’ve run into a few issues lately where customers are currently using ThinOS 8.x successfully with Citrix Netscaler/ADC but having issues connecting with Dell Wyse ThinOS 9.x.

In more than one case, it’s been an issue with the existing Netscaler Session Policy that was setup specifically for Wyse devices and contains information from the ThinOS 8.x User-Agent HTTTP/S request header that may no longer apply to ThinOS 9.

The ThinOS 8.x User-Agent request header is: CitrixReciever WTOS/1.0

The ThinOS 9.0 User-Agent request header is: “CitrixReceiver”/18.12.0.65534 (X11; Linux x86_64) Warthog/9.0.8024 (Release) X1Class CWACapable

**Update 8/2021 #1 ** ThinOS 9.1 User-Agent request header has been changed to: CitrixReceiver/18.12.0.65534 (X11; Linux x86_64) WTOS/9 (Release) X1Class CWACapable (‘Warthog/9.0.8024′ was replaced with: ‘WTOS/9’)

**Update 8/2021 #2 ** If ThinOS is using the built-in web browser to connect to an MFA site, for example, Okta, Duo, etc.. then the HTTP header will be one of the following:

Mozilla/5.0 (X11; Linux x86_64) AppleWebKit/537.36 (KHTML, like Gecko) Chrome/66.0.3359.181 Warthog/9.0 Safari/537

Mozilla/5.0 (X11; Linux x86_64) AppleWebKit/537.36 (KHTML, like Gecko) Chrome/66.0.3359.181 Electron/3.1.11 Safari/537.36

Note: The following below may not be true if using >9.1 as the http header now again contains “WTOS”.

The issue I’ve seen is many customers using ThinOS 8.x have a Netscaler Session Policies setup to look for a User-Agent to include “WTOS” or “WTOS/1.0” and that does NOT exist in the 9.x User-Agent header so the existing Session Policy will be ignored and not applied.

Network trace from ThinOS 8.6_511:

Network trace from ThinOS 9.0_4024:


Network trace from ThinOS 9.1.2101 / CWA 21.1.0.14.8


To fix this, you have 2 options.

Option #1: Create a new session policy on Netscaler/ADC to contain something from the ThinOS 9.x header, for example, ‘Warthog’ (name for ThinOS 9) so it uses the policy.

Option #2: Wyse Management Suite has the ability to specify the User-Agent header under the WMS Citrix Broker/Netscaler section.  

  • Under ‘Citrix Broker’ settings from ThinOS 8.x policy

  • Under ‘Broker Settings’ settings from ThinOS 9.x policy

Finally, we also saw an issue where we get the following error; INFO: “Waiting for token to change, then enter the new tokencode”

The existing Netscaler/ADC policy was set to have an RSA policy first BUT since that policy was setup using the 8.6, “WTOS”, header, it was going to the second policy and only allowing LDAP, but threw this error. Once we fixed the policy as noted above with proper header, we were able to use or RSA policy as primary, and the LDAP as secondary.

You can configure this behavior under the “Citrix Netscaler/ADC” settings section in the ThinOS 9 policy.  

Hope you found this helpful!

@chris_messier ~~> Subscribe to blog to get latest updates <~~