New! Dell Cloud Client Workspace and VDI Updates for July!

Wow! The past few weeks the Dell Cloud Client Workspace team and VDI teams have been busy launching a flurry of new updates! I wanted to share a quick run down of some of the key announcements just happening!

🚀 Wyse Management Suite (WMS) 4.1 launched!

  • What’s new in 4.1? Check out here!
  • My quick summary here!
  • Reviewers guide here
  • Quick video overview here

🚀 Dell ThinOS 2306 launched!

  • What’s new in 2306? Check out here!
  • Updated Microsoft AVD, Citrix, VMware, Teradici, Imprivata clients and much more!

🚀 Dell Windows 10 IoT 2306 launched!

  • What’s new in 2306? Check out here!
  • Third-party application improvements, Dell Application Store updates and more!

🚀 Dell Hybrid Client 2.5 launched!

  • What’s new in 2.5? Check out here!
  • Performance improvements, updates to the UI and many clients updates!

🚀 New Dell Demo Center WMS demo launched!

  • Take a quick test drive of the Wyse Management Suite here!

🚀*New* Implementation Services for Azure Virtual Desktop

That’s it for now – enjoy!

Community Resources!

Hope you enjoyed!! Let’s connect & subscribe to blog to get latest updates!

-Chris

New! Dell VDI Updates – Microsoft AVD on Azure Stack HCI, Citrix & VMware Updates!

Wow!! The Dell VDI product team has been busy at work and released a bunch of new updates that I wanted to share!!

They released some great content around Microsoft Azure Virtual Desktop on Azure Stack HCI & some new design and implementation guides for Citrix & VMware.

You can access all this great content here or some direct links below – enjoy!!

Azure Virtual Desktop

VMware Horizon

Citrix Virtual Apps & Desktops

Additional Resources:

@chris_messier ~~> Subscribe to blog to get latest updates <~~

Dell Wyse ThinOS 9 & Netscaler/ADC

I’ve run into a few issues lately where customers are currently using ThinOS 8.x successfully with Citrix Netscaler/ADC but having issues connecting with Dell Wyse ThinOS 9.x.

In more than one case, it’s been an issue with the existing Netscaler Session Policy that was setup specifically for Wyse devices and contains information from the ThinOS 8.x User-Agent HTTTP/S request header that may no longer apply to ThinOS 9.

The ThinOS 8.x User-Agent request header is: CitrixReciever WTOS/1.0

The ThinOS 9.0 User-Agent request header is: “CitrixReceiver”/18.12.0.65534 (X11; Linux x86_64) Warthog/9.0.8024 (Release) X1Class CWACapable

**Update 8/2021 #1 ** ThinOS 9.1 User-Agent request header has been changed to: CitrixReceiver/18.12.0.65534 (X11; Linux x86_64) WTOS/9 (Release) X1Class CWACapable (‘Warthog/9.0.8024′ was replaced with: ‘WTOS/9’)

**Update 8/2021 #2 ** If ThinOS is using the built-in web browser to connect to an MFA site, for example, Okta, Duo, etc.. then the HTTP header will be one of the following:

Mozilla/5.0 (X11; Linux x86_64) AppleWebKit/537.36 (KHTML, like Gecko) Chrome/66.0.3359.181 Warthog/9.0 Safari/537

Mozilla/5.0 (X11; Linux x86_64) AppleWebKit/537.36 (KHTML, like Gecko) Chrome/66.0.3359.181 Electron/3.1.11 Safari/537.36

Note: The following below may not be true if using >9.1 as the http header now again contains “WTOS”.

The issue I’ve seen is many customers using ThinOS 8.x have a Netscaler Session Policies setup to look for a User-Agent to include “WTOS” or “WTOS/1.0” and that does NOT exist in the 9.x User-Agent header so the existing Session Policy will be ignored and not applied.

Network trace from ThinOS 8.6_511:

Network trace from ThinOS 9.0_4024:


Network trace from ThinOS 9.1.2101 / CWA 21.1.0.14.8


To fix this, you have 2 options.

Option #1: Create a new session policy on Netscaler/ADC to contain something from the ThinOS 9.x header, for example, ‘Warthog’ (name for ThinOS 9) so it uses the policy.

Option #2: Wyse Management Suite has the ability to specify the User-Agent header under the WMS Citrix Broker/Netscaler section.  

  • Under ‘Citrix Broker’ settings from ThinOS 8.x policy

  • Under ‘Broker Settings’ settings from ThinOS 9.x policy

Finally, we also saw an issue where we get the following error; INFO: “Waiting for token to change, then enter the new tokencode”

The existing Netscaler/ADC policy was set to have an RSA policy first BUT since that policy was setup using the 8.6, “WTOS”, header, it was going to the second policy and only allowing LDAP, but threw this error. Once we fixed the policy as noted above with proper header, we were able to use or RSA policy as primary, and the LDAP as secondary.

You can configure this behavior under the “Citrix Netscaler/ADC” settings section in the ThinOS 9 policy.  

Hope you found this helpful!

@chris_messier ~~> Subscribe to blog to get latest updates <~~

Microsoft Teams Optimization for Dell Wyse ThinOS 9


Microsoft Teams Optimization is now available for Dell Wyse ThinOS 9 with the launch of the latest Citrix WorkSpace app 2006 for Linux. Users of ThinOS 9 can now download this latest Citrix WorkSpace app and get the benefits of Microsoft Teams Optimizations in a Citrix environment.

Unified Communications have always been a challenge in virtual desktop environments and the continued innovations in this area are much needed.

Citrix does a nice job of outlining the details of how the optimization works along with a quick video in this blog post.

Here are some additional details:

  • Download this latest Citrix WorkSpace App 2006 for ThinOS 9 here
  • Check out ThinOS 9 release notes for additional details here

Supported Platforms and Management Software:

  • Wyse 5070 Thin Clients (ThinOS)
  • Wyse 5470 Mobile Thin Clients (ThinOS)
  • Wyse 5470 AIO Thin Clients (ThinOS)
  • Wyse 3040 Thin Clients (ThinOS)
  • Wyse Management Suite 2.1

Citrix resources for Microsoft Teams Optimization

ThinOS 9 Resources

Enjoy!

@chris_messier ~~> Subscribe to blog to get latest updates <~~

SSL Certificates & Wyse Management Suite

In a previous post, here, I covered how to resolve the SSL error message, “SSL Certificate Authority is Unknown” when using ThinOS.

In this post I will cover how to upload SSL certificates into Wyse Management Suite (WMS) and how to assign them to a specific group configuration/profile for ThinOS 8.x and 9.x.

The process is slightly different for ThinOS 8.x & ThinOS 9.x but I will cover both below. 

How to upload SSL certificates for use by ThinOS 8.x:

1. In WMS, browse to “Apps & Data”:

2. Scroll down to “File Repository”:

3. Click “Add File” to upload Certificate:

4. Browse out to the Certificates you exported. You will need to do for each Certificate you exported.


5. Once you click upload it should show up under the ‘Apps & Data – Inventory File Repository”:


How to upload SSL certificates for use by ThinOS 9.x:

    1. In your ThinOS 9 policy, browse to “Privacy & Security\Certificates”. Here you can turn on “Auto Install Certificates” and browse to the certificates you want to upload as shown below:


How to assign SSL Certificates to WMS configuration group/policy: 

Once your certificates are imported into WMS, you then need to assign them to your ThinOS profile you are using under, “Groups & Configs” select the group you want to edit following steps below;

  • ThinOS 8.x: in the policy, browse to “Device Configuration\Security\General Settings”. Select “Auto-install Certificates” and your Certificate should show up in the list to select. Once you are done, click “Save & Publish”. The next time the device reboots, it will pick up the new Certificate.

  • ThinOS 9.x: in your policy, browse to “Privacy & Security\Certificates”. Here you can turn on “Auto Install Certificates” and browse to the certificates you want to upload as shown below:

This completes the process of uploading your SSL certificates to WMS and assigning them to a ThinOS policy.

For more assistance, check out Dell Community Forums (formally Dell TechCenter):

@chris_messier ~~> Subscribe to blog to get latest updates <~~


Dell Wyse ThinOS – “SSL Certificate Authority is Unknown”

“SSL Certificate Authority is Unknown”

A common issue connecting to a VDI connection broker, i.e Citrix, VMware, etc.., from Dell Wyse ThinOS or any thin client, is an SSL certificate error. There are generally 2 reasons why.

  • the Root Certificate Authority certificate is not installed on the device
  • the Intermediate Certificate Authority certificate is also not installed on the device

Error: SSL Certificate Authority is Unknown

This is easily fixed by installing both the missing Root and likely the Intermediate certificate.

To do this, you can simply export from a browser, and then import on the device, generally through Wyse Management Suite (WMS) or even a USB key if you had to.

I will cover the 3 step process to fix this.

  1. Export the required certificates from a browser
  2. Upload into Wyse Management Suite
  3. Assign the certificates to the device profile

Steps to export certificate from browser:

  1. In this example, I used https://portal.vmware.com as an example to work with certificates but this would be your VMware Horizon server, Citrix Storefront site, Citrix Netscaler/ADC, Microsoft Azure MFA site, etc…
  2. Click on the SSL padlock on your browser as shown below to bring up below window. Click on ‘Certificate (Valid)’ field.

3. This will bring up the certificate information:

4. Click on “Certification Path” tab bring up the following:

5. Select the top level certificate, in this case, “Sectigo (formally Comodo CA)”

6. This will bring up the Root certificate as shown below, “Comodo RSA Certification Authority”. This is the first certificate we want to export.

7. Click on the “Details” tab and select, “Copy to File”:

8. Take defaults and follow the wizard to export the certificate:

9. Once you export the top level Root Certificate, follow the same steps to export the Intermediate certificate. This Intermediate is chained, or trusted, by this top level Root Certificate so we need both certificates in this chain.

10. In the browser, select the Intermediate Certificate, “COMODO RSA Domain Validation Secure Server CA” and select “View Certificate”:

11. Select “Details” and “Copy to File” to export the certificate:

12. Follow wizard again to export the Intermediate Certificate:

13. You now have successfully exported both the top level Root Certificate, “Comodo RSA Certification Authority”, and the Intermediate Certificate, “COMODO RSA Domain Validation Secure Server CA”.

Once exported you need to upload them into your WMS server. It’s a simple process and the steps to upload the certifications are outlined here. Once complete, resume to step 15 below to assign the certificate(s) to your group configuration/profile.

15. Once certificates are imported into WMS, you then need to assign them to your ThinOS profile you are using under, “Groups & Configs” select the group you want to edit following steps below;

  • ThinOS 8.x: in the policy, browse to “Device Configuration\Security\General Settings”. Select “Auto-install Certificates” and your Certificate should show up in the list to select. Once you are done, click “Save & Publish”. The next time the device reboots, it will pick up the new Certificate.

  • ThinOS 9.x: in your policy, browse to “Privacy & Security\Certificates”. Here you can turn on “Auto Install Certificates” and browse to the certificates you want to upload as shown below:


This completes the process of exporting the SSL certs, uploading to WMS, and assigning them to your profile. This should resolve the issue of “SSL Certificate Authority is Unknown”.

For more assistance, check out Dell Community Forums (formally Dell TechCenter):

@chris_messier ~~> Subscribe to blog to get latest updates <~~
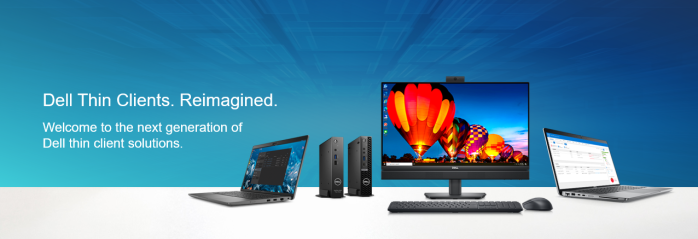
New! Wyse 5470 Thin Client Laptop and 24″ All in One!

Dell has recently released 2 new models, the Dell Wyse 5470 Thin Client Laptop and a 24″ All in One thin client!

The big news here is it’s the first thin client laptop Dell has released that runs Wyse ThinOS. The thin laptop also comes in Windows 10 IoT along with the ThinLinux platform. We’ve had Windows and Linux based thin laptops in the past but we’ve always had demand for a ThinOS version so it’s finally here!

The other Dell Wyse first is a ThinOS based 24″ All in One which we seen lots of interest in the healthcare space and other verticals interested in AIO’s. This replaces the previous 21.5″ ThinOS and the 24″ Teradici based options we had.

See more below!

Product video of 5470 All in One here!

Product video of 5470 Thin Client Laptop here!

Enjoy!

@chris_messier ~~> Subscribe to blog to get latest updates <~~

New Updates! Cisco Jabber & Microsoft Skype for Business Enhancements for Wyse ThinOS

Cisco Jabber & Microsoft Skype for Business, and other unified communications solutions, are some of the solutions often requested in virtual desktop deployments. Citrix & VMware have both made some key advancements on the server side, i.e. Citrix HDX RealTime Optimization Pack (RTME) & VMware Horizon Virtualization Pack for Skype for Business.

Most of the client side solutions to ‘offload’ some of this processing has been focused on using Windows, or Windows Embedded, based endpoints. The request of many customers is to simplify & secure the endpoint as much as possible, which can lead to using a non-Windows based endpoint and running Windows 10/7 in the data center.

Dell Wyse just released Wyse ThinOS 8.6 which includes support for Cisco Jabber Softphone for VDI for Citrix and Skype for Business on VMware Horizon.

You can see more on these announcements here and some technical details in the Wyse ThinOS 8.6 release notes here.

Enjoy!

@chris_messier ~~> Subscribe to blog to get latest updates <~~

Using HTTP for StoreFront Server

In some recent lab testing I setup Citrix StoreFront to use HTTP as I was running some quick tests and didn’t need HTTPS for my test.

Unfortunately, by default, the Citrix Receiver only allows you to connect via HTTPS. If you enter an HTTP URL, it won’t allow you to save it and instead, get the following error:

“The specified server address is not secure”

StoreFront1

Once you click, “Add”, you will get the following:

“HTTP Store requires additional configuration before being added to the Citrix Receiver. Please contact your system administrator.”

StoreFront3

The fix for this is to edit/add the following Registry keys on the client your using the Citrix Receiver to connect from:

  1. Set HKLM\Software\[Wow6432Node\]Citrix\Dazzle\AllowAddStore to A to allow users to add non-secure stores.
  2. (Optional) Set HKLM\Software\[Wow6432Node\]Citrix\Dazzle\AllowSavePwd to A to allow users to save their passwords for non-secure stores.
  3. To enable the addition of a store that is configured in StoreFront with a TransportType of HTTP, add to HKLM\Software\[Wow6432Node\]Citrix\AuthManager the value ConnectionSecurityMode (REG_SZ type) and set it to Any.
  4. Exit and restart Citrix Receiver.

Source: Configure and install Receiver for Windows using command-line parameters

You should now be able to use an HTTP URL in your Citrix Receiver to connect to StoreFront successfully!

Hope this helps someone else down the road!

@chris_messer ~~> Subscribe to blog to get latest updates <~~

NVIDIA Releases Updates to NVIDIA GRID GPU line!

Today, NVIDIA announced some updates to the  line of NVIDIA GRID GPU’s for VDI. I continue to see the use cases increase for GPU’s in VDI so great to see these new releases. The increase in user density is one of the key considerations customers always ask; how many users per server/GPU? Great to see the users density continue to increase!

Here are some details from todays launch webinar and my key takeaways;

  • renamed vWorkstation license version to Quadro Virtual Data Center Workstation Software (Quadro vDWS)
  • newer P40 & P6 GPU’s do NOT have 512MB profile (min is 1Gb)
  • a new license server will be released; 5.0
  • 50% more vGPU per physical GPU (improves density!)
  • updated/newer monitoring and insight integration into VMware vRealize Operations and 3rd party’s, i.e. Liquidware Labs, Lakeside, ControlUp, eGInnovations, etc..

Updated NVIDIA GRID line:

You can see press release here.