As you might know, Microsoft Intune has quickly become one of the most popular management tools for a managing a companies fleet of devices. Dell recognizes this and has continued to work to integrate and add new tools that integrate directly within Intune so management is done through that single pane of glass.
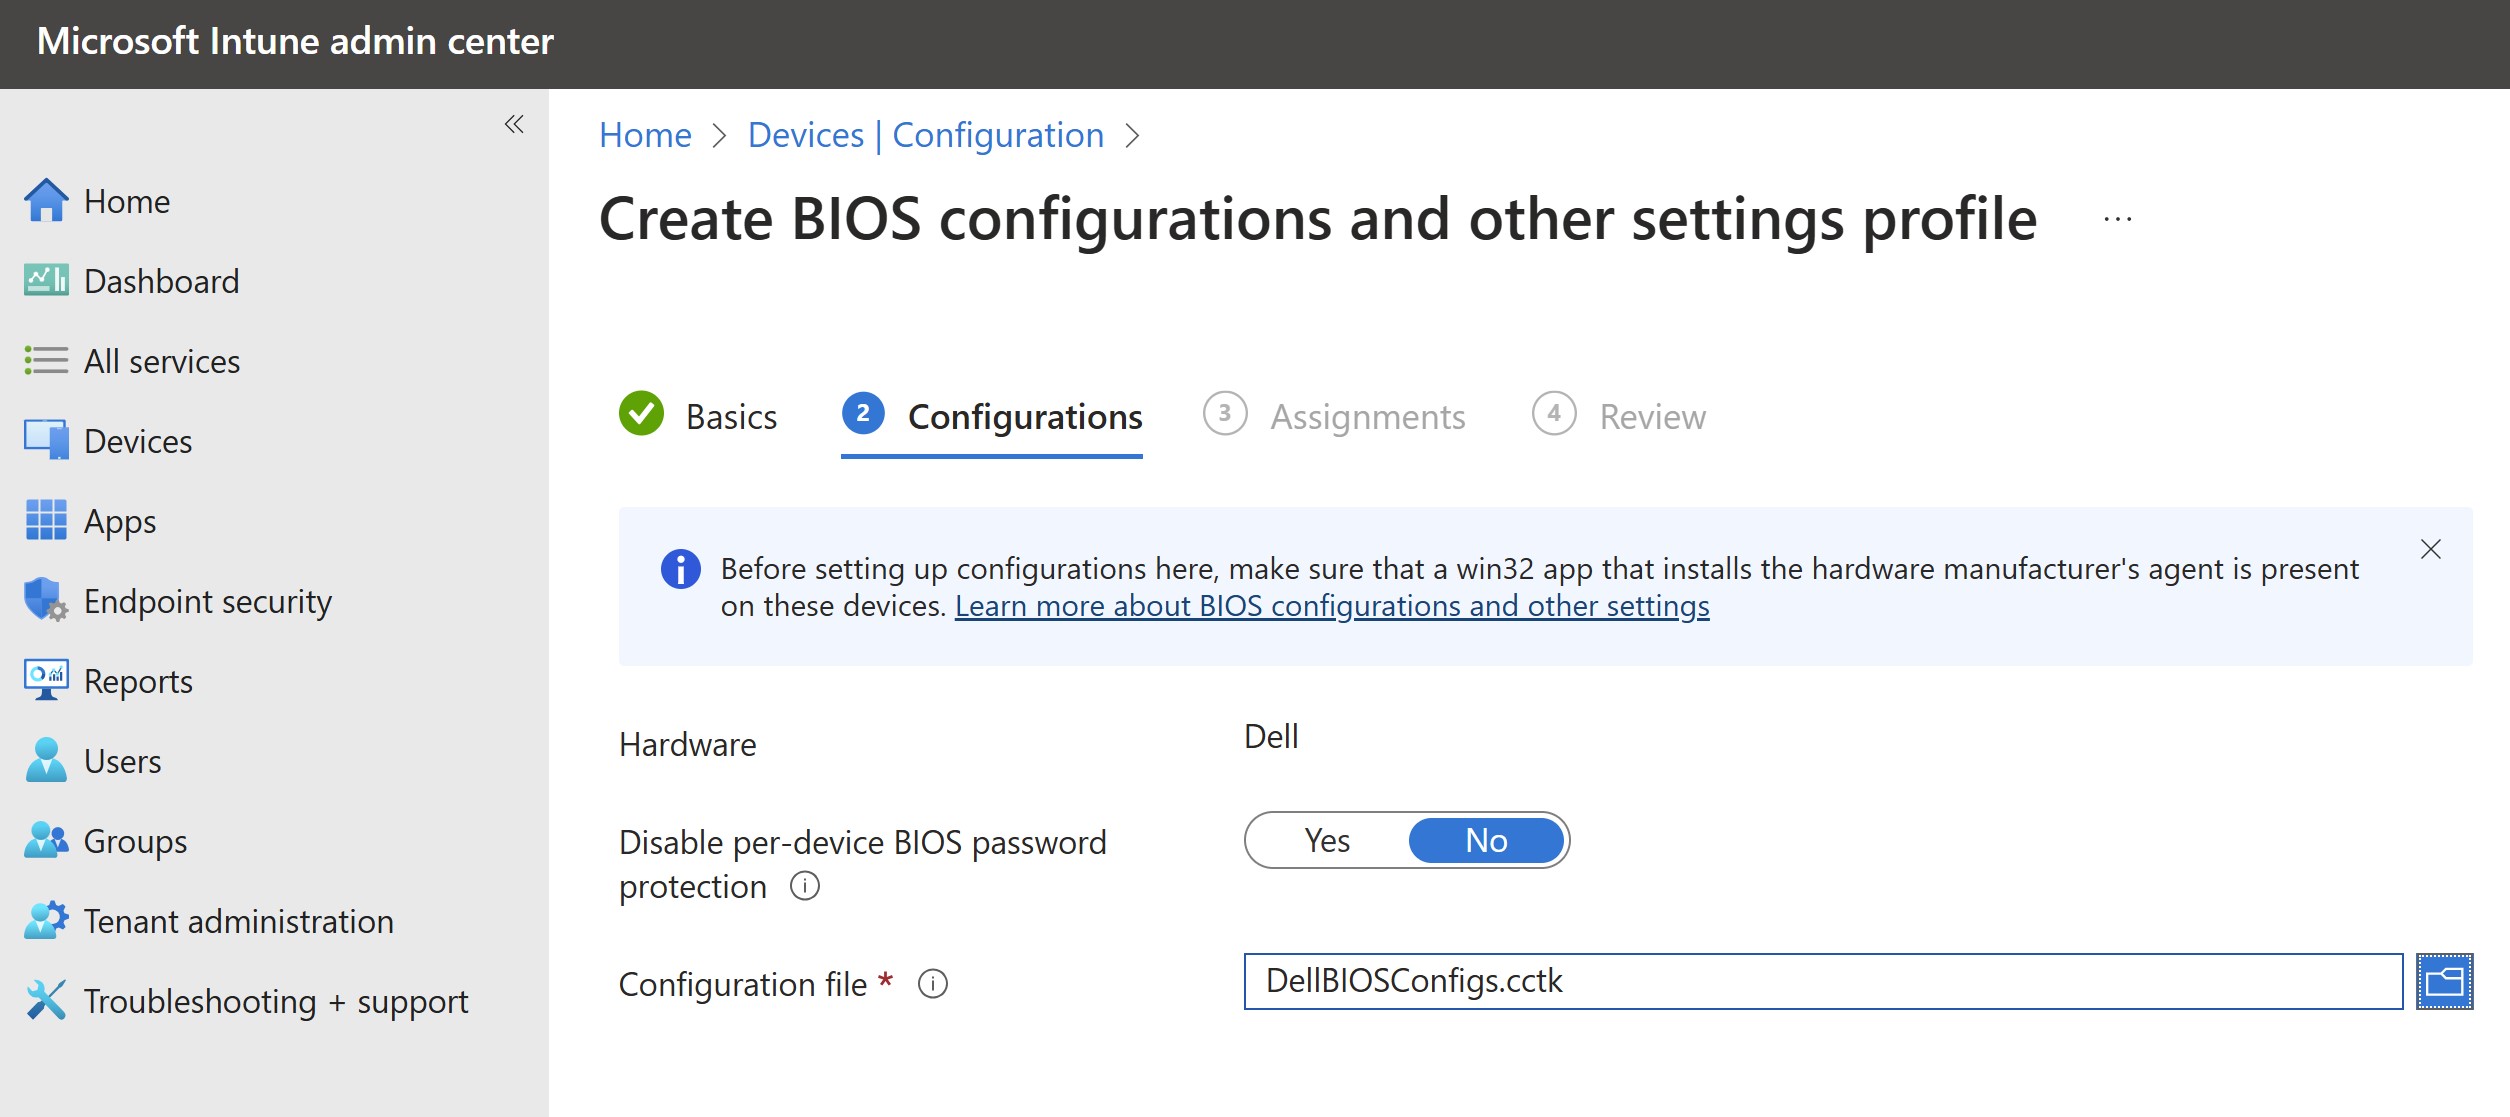
This allows you the ability to manage & deploy Dell client BIOS settings directly within your Intune portal. You basically deploy the Endpoint Configure application to the client, create a BIOS configuration package and upload that to Intune. Once configuration is in Intune, you can then create the device configuration policy to deploy out to the devices as needed.
Here is a quick overview of what the process looks like;
Here are couple screen shots of what the configurations look like;
Wow! The past few months for the Cloud Client Workspace (CCW) team have been busy including just finishing up Dell Technologies World 2024 last week! If you’re not familiar with the CCW portfolio check out our client overview guide to get familiar with our solutions!
I wanted to share a quick run down of some of the key announcements in the past couple months!
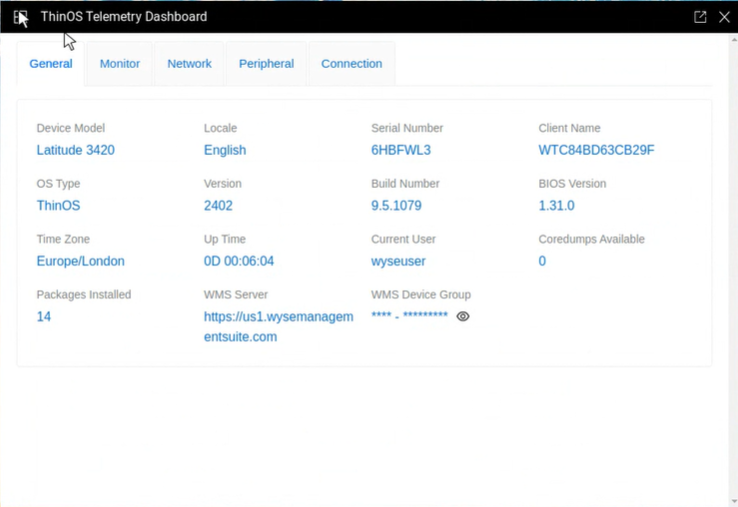
A new feature in ThinOS 2402 and Wyse Management Suite (WMS) 4.3 is the addition of some great telemetry data on the ThinOS devices. It reports a bunch of info including CPU, memory, storage & network usage along with device network information, connected peripherals, connection broker, currently signed on users, & remote connection info.
In order to get this telemetry data into WMS you need to do the following 2 steps –
In WMS, Enable Telemetry Dashboard under System Settings\Device Monitoring
On ThinOS, install the Telemetry Dashboard package, go to dell.com/support, select your thin client model and select Applications, Telemetry Dashboard – current version “ThinOS 2402 (9.5.1079) Telemetry Dashboard v1.0.0.8” here.
The telemetry tab in the WMS dashboard will get populated once enabled in WMS & the package is installed on ThinOS:
It’s an easy 1 button configure to enable the Telemetry data in WMS:
You can also view the Telemetry data locally on the ThinOS device under Troubleshooting\Telemetry Dashboard:
ThinOS Telemetry Dashboard\General tab:
ThinOS Telemetry Dashboard\Monitor tab:
ThinOS Telemetry Dashboard\Network tab:
ThinOS Telemetry Dashboard\Peripheral tab:
ThinOS Telemetry Dashboard\Connection tab:
We continue to innovate in Dell ThinOS and hope you found this helpful! Any questions please let me know!
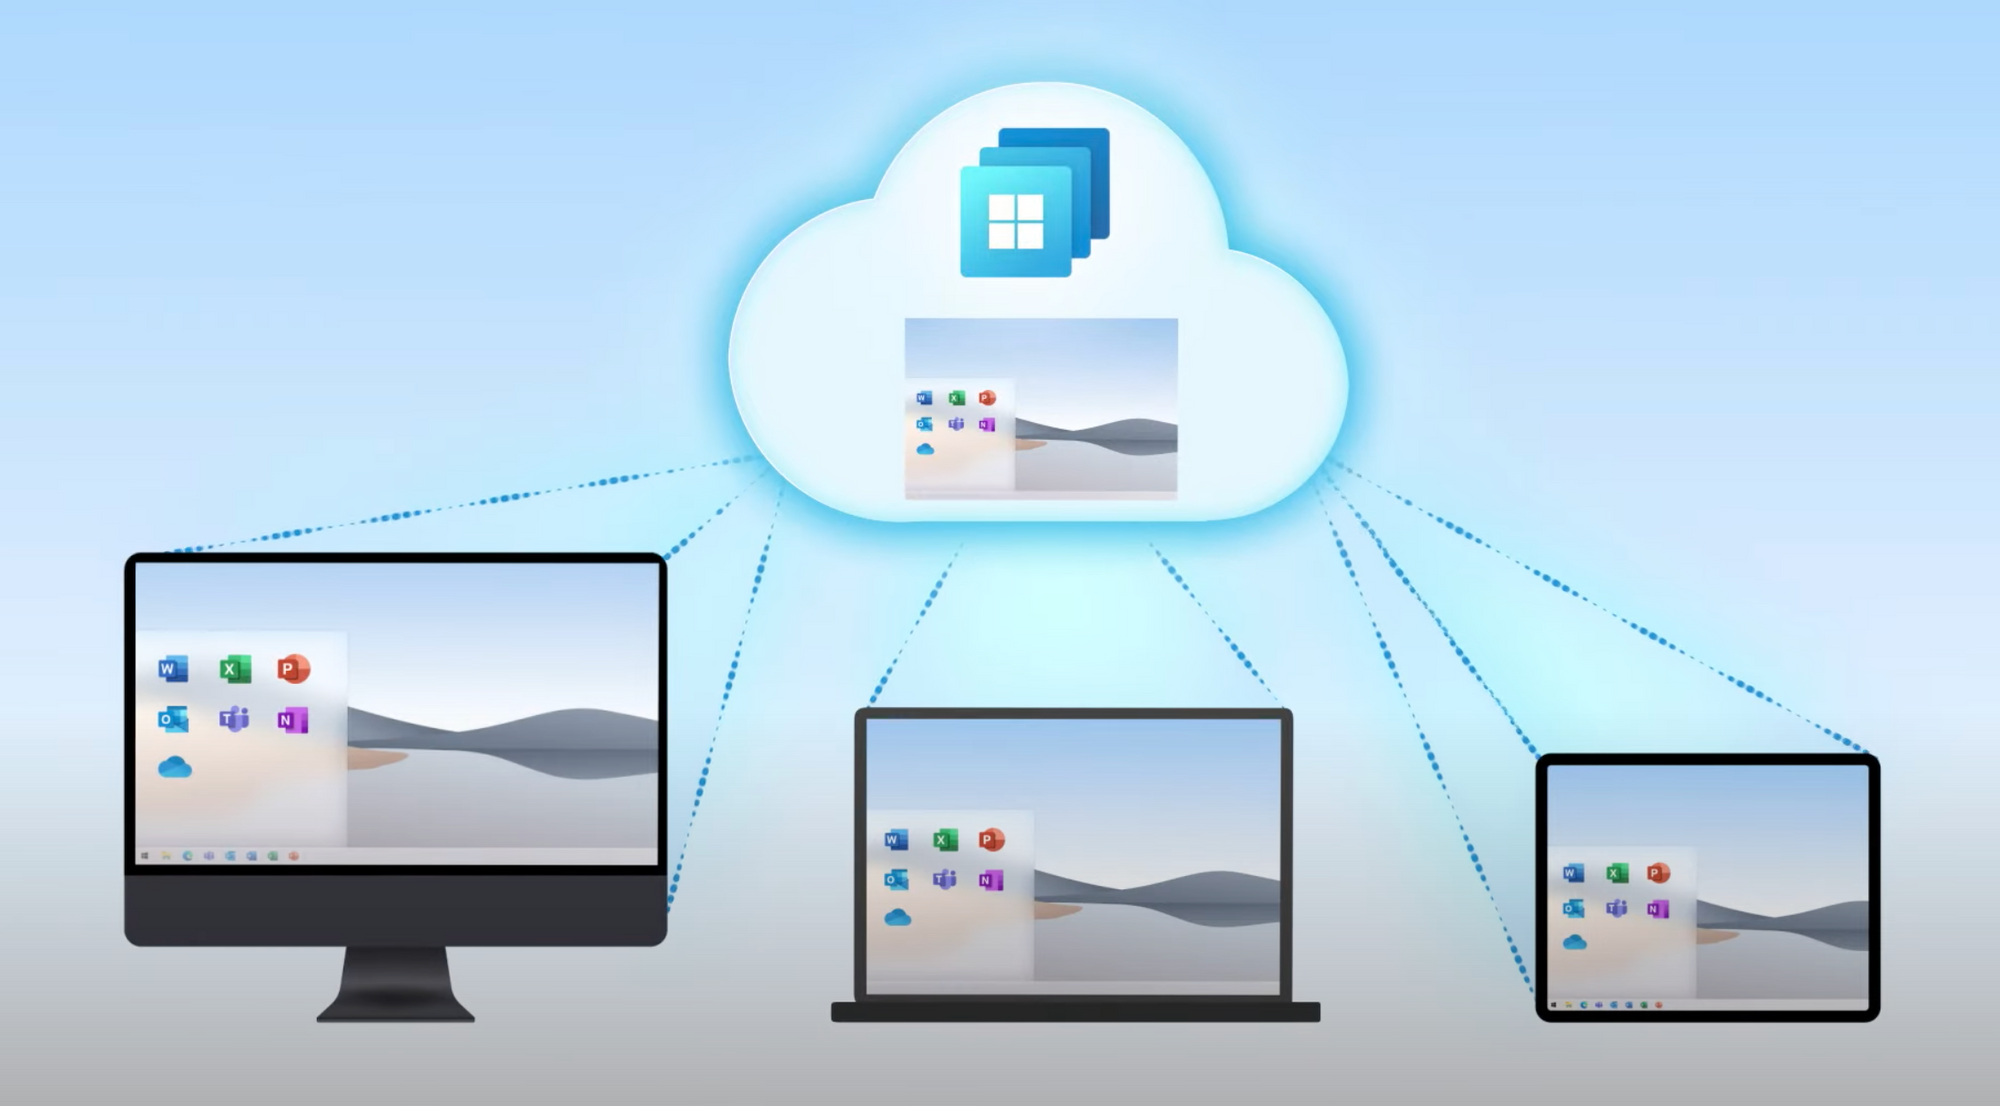
I wanted to create a quick 2-min demo showing the Dell ThinOS bootup and login process to a Windows 365 Cloud PC .
The process is pretty quick and the experience is the same whether it’s Azure Virtual Desktop (AVD), VMware Horizon, Citrix Virtual Apps/Desktops, etc…
In this demo I pre-populate the users Azure AD credentials via Wyse Management Suite to speed up login and is an example of what you may use in a kiosk environment.
Wow! The past few weeks the Dell Cloud Client Workspace team and VDI teams have been busy launching a flurry of new updates! I wanted to share a quick run down of some of the key announcements just happening!
The latest Wyse Management Suite (WMS) 4.1 has been released and I wanted to share some great updates! This has already been rolled out via our WMS Cloud and if you run on-prem, you can download WMS 4.1 here.
If you’re new to Wyse Management Suite and just want a quick peek at it, check out our new interactive demo! You can also check out a quick 1 min video here!
Here’s a quick rundown of the key features and enhancements:
➡️ Management for ThinOS 2306 features & platform expansion
➡️ Management for Dell Hybrid Client 2.5 features & platform expansion
➡️ Management for Windows 10 IoT Enterprise LTSC 2021 (QR 2306) & platform expansion
➡️ New configuration user interface (ConfigUI) for Windows 10 IoT. Now Win10 IoT, ThinOS, and DHC share a common WMS ConfigUI proving a more modern, consistent and intuitive experience for Dell thin clients
➡️ Migrated the WMS on-premises database to the MongoDB Enterprise version, replacing the MongoDB Community version which has EOL’d (applies to both WMS Standard and Pro versions). The MongoDB Enterprise version provides better security, compliance and Enterprise-grade support.
➡️ Customer-specific requests
➡️ Bug fixes
Cloud Client Workspace: your virtual workspace reimagined!
One of the options with Wyse Management Suite (WMS) cloud or on-prem is the ability to install a remote repository to host OS images or packages. This isn’t often required, especially with ThinOS, as the images and packages can be hosted centrally in WMS cloud or the main repository as part of your on-prem install. We also can host packages in WMS cloud for Windows 10 IoT & Dell Hybrid client.
In this case, the customer wanted to convert their existing home users who are using Windows 10 IoT based thin clients to Dell ThinOS thin clients using WMS cloud. In order to do this we needed a cloud hosted repository to host this ThinOS conversation image for all the Windows 10 IoT thin clients to download the ThinOS image from. We installed the WMS repository on a Windows Server 2019 VM in Azure and synced it with our WMS cloud portal.
I wanted to outlined the WMS repository installation and Azure virtual machine configuration below.
Review the WMS repository installation prerequisites here in the WMS admin guide in order to configure your Azure, or on-prem VM installation.
2. Download the latest WMS repository installation from the WMS downloads site here
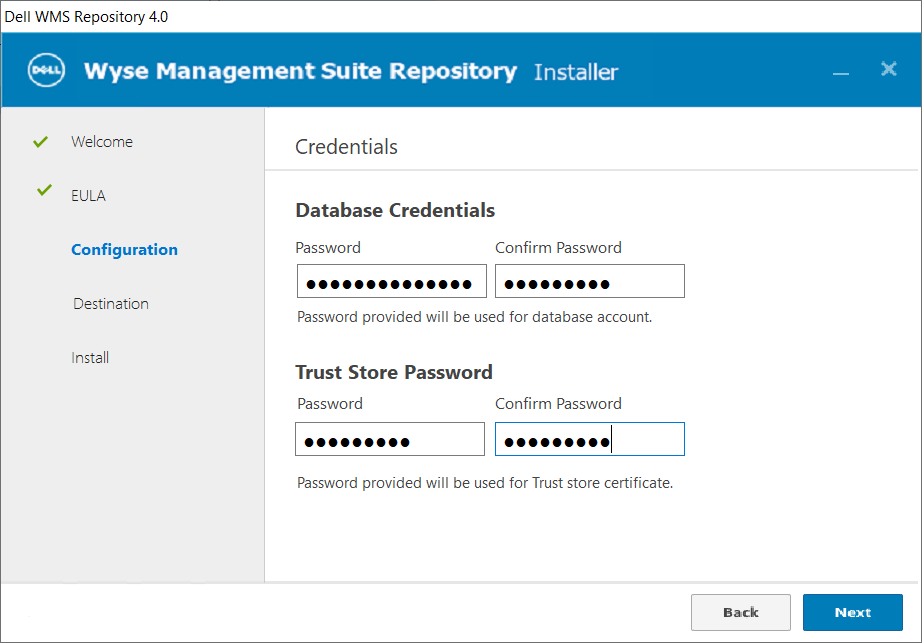
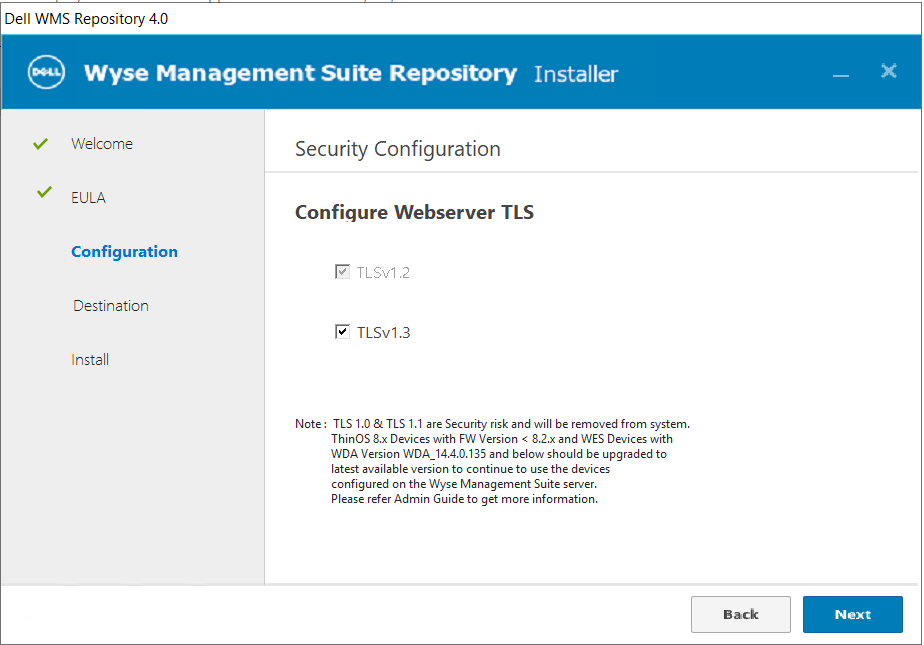
3. Install the WMS repository following the below prompts;
4. NOTE: Once the installation finishes and you click ‘Launch’ it make take 1-2 minutes for the installation to finish, close and then launch the browser, so be patient while it finishes. The WMS repository service is starting and the web page will be unavailable until it starts. You can confirm the services started by looking here:
5. Once the web pages launches, you will be brought to the registration page. Once you are here you have a few options to configure:
The URL of your WMS server
Here we have the option to “Register to Public WMS Management Portal” or specify the FQDN of your on-prem WMS server. In my case, we are going to register to WMS cloud so we will select “Register to Public WMS Management Portal” & select “us1.wysemanagementsuite.com” (or eu1. if you’re using that tenant).
The second important item is the ‘WMS Repository URL“. This will be the URL the client that is downloading the image from will connect to. In my case, since we are using WMS cloud and doing this for remote home based users, we need to make sure that WMS Repository URL resolves externally to my server and is accessible over the Internet. By default, it lists the hostname of the server.
Here I selected “us1.wysemanagementsuite.com” & changed my WMS repository URL to an FQDN that maps to my Azure WMS repository VM: hostname.vditoolbox.com
6. Once you click ‘Register’, it will connect to your WMS management server and register successfully.
7. You can confirm it registered succussfully by looking on your WMS console under Portal Administration\File Repository:
8. At this point, your WMS repository is installed and successfully connected to your WMS portal!
9. From here, in my example I downloaded the Windows 10 IoT to ThinOS conversation image to my Azure repository and synced with my WMS portal. By default, ‘Automatic Replication’ is selected but you can also click ‘Sync Files’ or ‘Check-In’ to ensure the repository is synching & checking in successfully. If you’re doing a conversion as well, you can read more here.
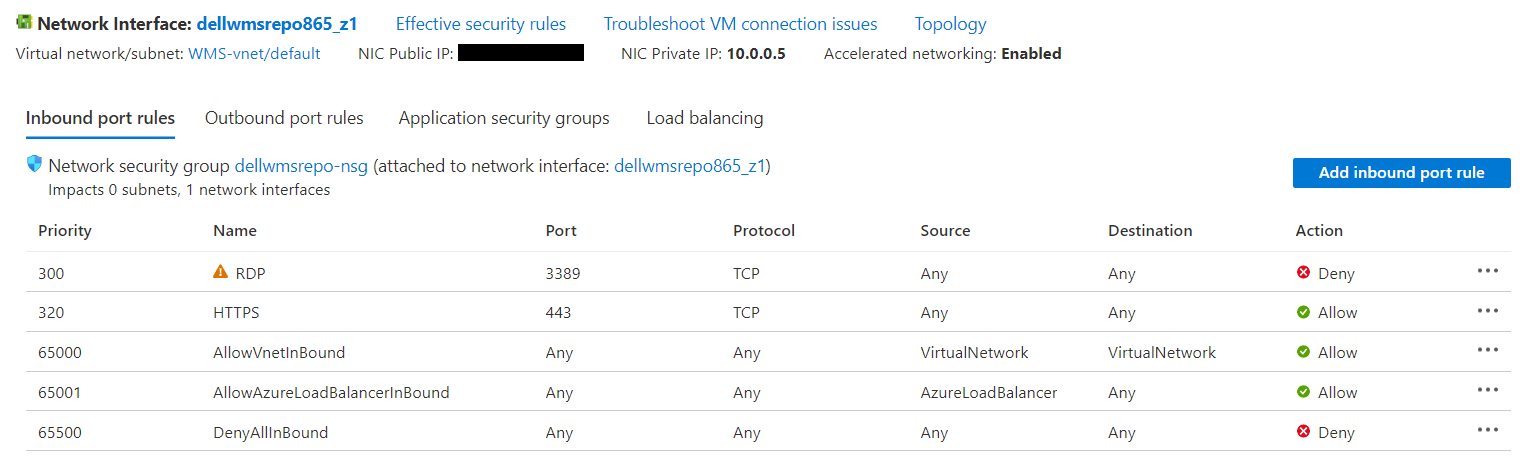
10. The final step is to make sure your Azure VM is accessible externally. In my example, I used hostname.vditoolbox.com that has DNS record that resolves to the public IP address of my Azure VM. I’ve included an example of the lab setup I had during testing and yours will likely be different based on network, security groups, etc.. but wanted to give you an idea.
Troubleshooting:
We initially were receiving an error when pushing the conversion image but not a smaller package. The issue turned out to be an issue with the header and we think the the very long file name compared to that of other package files and it was getting blocked. When the thin client connected to download the image, the Azure Web Application firewall was blocking the connecting and the thin client displaying the following error:
WMS Repository Server is not available or required imaging files are missing. Trying again….Number of Retry = 1
We also saw the following error right before imaging started, followed by the one above:
When we looked at the WMS WDA logs we saw the following:
18/01/2023 13:26:37.376 E 5764 6 Unable to perform http request… 18/01/2023 13:26:37.392 E 5764 6 CCMConnectionData: BaseConnectionString: https://us1.wysemanagementsuite.com:443/Mac: “b0:4f:13:bf:08:f4″OwnerId: “50359860”WyseId: “wyse3826922988332208998″AuthCode: “****”UserAgentHeader: “Stratus /4.7.5.0 (WES 10.0.17763; en-US; Wyse 5470; Revision:14.6.2.13; cls:A)” 18/01/2023 13:26:37.392 I 5764 6 WebException returned ProtocolError – The remote server returned an error: (400) Bad Request.
The Azure administrator then looked at the Azure Web Application firewall logs and saw the following:
REQUEST-920-PROTOCOL-ENFORCEMENT.conf 920450 Restricted HTTP headers: The use of certain headers is restricted. HTTP header is restricted by policy (%{MATCHED_VAR}) Pattern match ^.*$; Within Tx:restricted_headers at REQUEST_HEADERS_NAMES. /wms-repo/image/os?filePath=ThinOS_2211_9.3.3099_WES_Conversion%5CThinOS_2211_9.3.3099_WES_Conversion%5CThinOS_2211_9.3.3099_WES_Conversion\u0026fileName=commandsXml.xml
Once the Azure admin relaxed this rule, the device was able to download the image immediately.
Deploying Azure Virtual Desktop (AVD) in a Kiosk configuration is a common question we get asked when using Dell Windows 10 IoT thin clients.
The idea is when the device boots, it will present only with an AVD login with no other options present on the desktop, start menu, etc… thus creating a locked down kiosk solution.
By default, this is the behavior with ThinOS & AVD since the device is natively locked down. An example of this is outlined in a previous post here.
We can also do the same thing with Dell Windows 10 IoT by using a great Dell utility included in IoT called EasySetup. You can configure this tool in the Wyse Management Suite console and just specify an AVD connections and remove any other options, icons, configuration, etc.. from the desktop of the thin client. These same steps can be used to configure any other VDI connections, i.e. Citrix, VMware, browser icons, etc..
You can configure by following the steps below;
Configure your Wyse Management Suite (WMS) group configuration to launch the AVD client as shown below.
In WMS, select the Group Configuration you want to edit, and select ‘WES’.
2. In the WES WMS configuration group, go to ‘Wyse EasySetup‘ and enable ‘Kiosk Mode‘. Under ‘Applications‘, section give the connection icon a name, i.e. AVD Desktop and under ‘Application Location‘, enter the path to the AVD client, i.e. C:\Program Files\Remote Desktop\msrdcw.exe
Configure any of the optional settings as desired.
3. Once complete with the settings, click ‘Save & Publish‘ at the top of the page to save settings.
4. Once the device boots up and downloads your updated WMS configuration, it will enable the Wyse EasySetup shell and the end result should be the following below.
Note: The File Base Write filter needs to be enabled in order for the Wyse EasySetup shell to be enabled and applied. If not, you will boot to the normal Windows desktop and not see the single icon as shown below.
5. By default, the ‘Wyse Easy Setup’ policy removes many configurations from the start menu so the user can’t access any settings. If you want to enable some specific Start Menu options, Control Panel settings, task bar settings, etc.. you can toggle many of these features on in the ‘Wyse Easy Setup’ policy.
For example, some of the settings you can enable are shown below. These settings are located the same ‘Kiosk Mode’ section shown above. To see more details of the available Wyse EasySetup configuration options search for the latest the WMS administration guide here.
I hope this helps provide some additional information about using the Wyse EasySetup utility to setup an Azure Virtual Desktop connection in Kiosk mode on Windows 10 IoT thin client.
Hope you found this helpful!
Additional Resources:
Prior article on installing the AVD client onto Windows 10 IoT here.