Deploying Azure Virtual Desktop (AVD) in a Kiosk configuration is a common question we get asked when using Dell Windows 10 IoT thin clients.
The idea is when the device boots, it will present only with an AVD login with no other options present on the desktop, start menu, etc… thus creating a locked down kiosk solution.
By default, this is the behavior with ThinOS & AVD since the device is natively locked down. An example of this is outlined in a previous post here.
We can also do the same thing with Dell Windows 10 IoT by using a great Dell utility included in IoT called EasySetup. You can configure this tool in the Wyse Management Suite console and just specify an AVD connections and remove any other options, icons, configuration, etc.. from the desktop of the thin client. These same steps can be used to configure any other VDI connections, i.e. Citrix, VMware, browser icons, etc..
You can configure by following the steps below;
Configure your Wyse Management Suite (WMS) group configuration to launch the AVD client as shown below.
- In WMS, select the Group Configuration you want to edit, and select ‘WES’.

2. In the WES WMS configuration group, go to ‘Wyse EasySetup‘ and enable ‘Kiosk Mode‘. Under ‘Applications‘, section give the connection icon a name, i.e. AVD Desktop and under ‘Application Location‘, enter the path to the AVD client, i.e. C:\Program Files\Remote Desktop\msrdcw.exe
Configure any of the optional settings as desired.

3. Once complete with the settings, click ‘Save & Publish‘ at the top of the page to save settings.

4. Once the device boots up and downloads your updated WMS configuration, it will enable the Wyse EasySetup shell and the end result should be the following below.
Note: The File Base Write filter needs to be enabled in order for the Wyse EasySetup shell to be enabled and applied. If not, you will boot to the normal Windows desktop and not see the single icon as shown below.


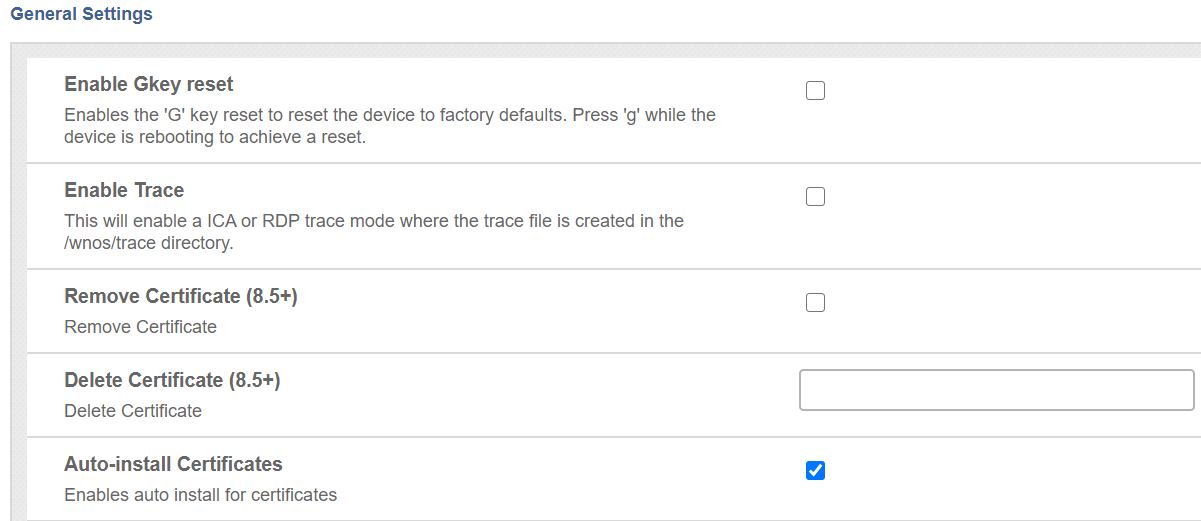
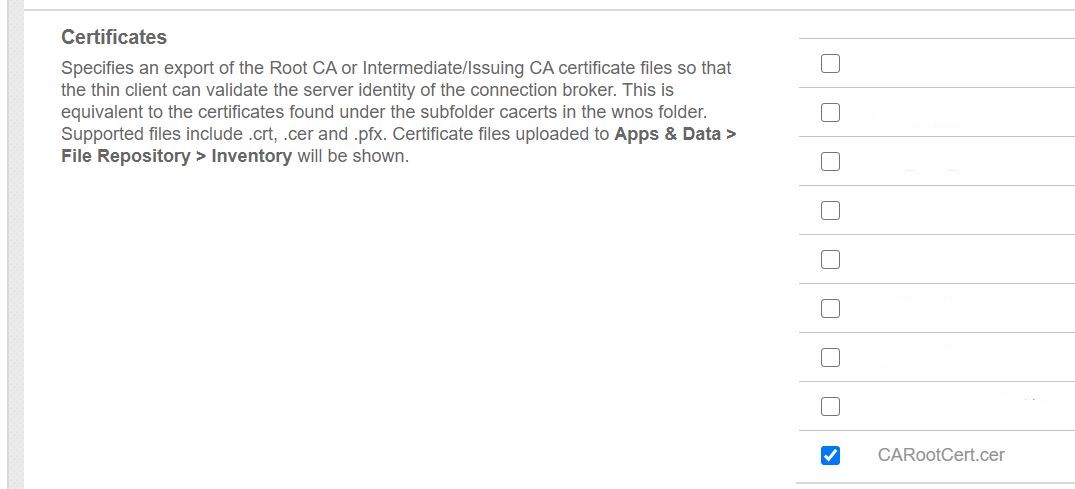
5. By default, the ‘Wyse Easy Setup’ policy removes many configurations from the start menu so the user can’t access any settings. If you want to enable some specific Start Menu options, Control Panel settings, task bar settings, etc.. you can toggle many of these features on in the ‘Wyse Easy Setup’ policy.
For example, some of the settings you can enable are shown below. These settings are located the same ‘Kiosk Mode’ section shown above. To see more details of the available Wyse EasySetup configuration options search for the latest the WMS administration guide here.

I hope this helps provide some additional information about using the Wyse EasySetup utility to setup an Azure Virtual Desktop connection in Kiosk mode on Windows 10 IoT thin client.
Hope you found this helpful!
Additional Resources:
- Prior article on installing the AVD client onto Windows 10 IoT here.
- Windows 10 IoT admin and release notes here
- Wyse Management Suite documentation here
- Dell ThinOS & Azure Virtual Desktop here
- Excellent Dell Wyse community located here
- Dell Thin Client Community forums here
- Microsoft AVD Community forums here
- Great AVD information site & user community here
@chris_messier ~~> Subscribe to blog to get latest updates <~~


 6. In this case I have access to a Windows 10 VM!